Create Project
Reactant CLI
Luckily that we have a plugin project template and a CLI tool that can help us generate a blank project quickly, neat!
Download the latest reactant cli, unzip it into a folder, and add that folder into PATH in environment variables (Just like what you do after downloaded JDK)
Create Project
Execute the following command in your terminal, and follow the instructions.
The CLI will ask the group name, in this quickstart, we will use com.example as our group name.
After the command executed, a folder named MyFirstPlugin should be created. Structure as following:
And you will see your MyFirstPlugin.kt main class should be created with a default logger like as below:
How @ReactantPlugin Work
@ReactantPlugin Annotation is used to tell Reactant where to find your Components, and it will search recursively.
Components out of the package will not be loaded.
Remind that you should not include the packages that are not owned by your plugin, otherwise it may break other Reactant plugins if you shaded their classes.
Compile your plugin
To compile your plugin, use the following command inside the MyFirstPlugin folder:
The compiled file will be located at MyFirstPlugin/build/libs/MyFirstPlugin-0.0.1.jar.
If you have enabled the shadow jar when generating the project using CLI, HelloWorld-0.0.1-all.jar will be the fat jar that shaded all dependencies.
Auto deploy plugin to local server
The gradle build script will copy the compiled plugin to the local server if Auto Deploy is enabled when creating the project.
To use the Auto Deploy, you have to set the Environment Variable
PLUGIN_DEPLOY_PATH to the folder that the plugin should be deployed to.
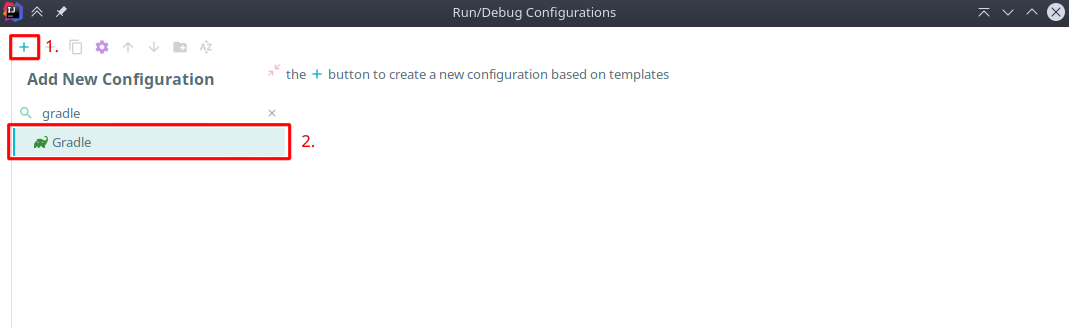
If you are using IntelliJ IDEA, you can do the following steps to config it:
Click the button next to the run button.

Click add configuration and select gradle. You can skip this step if you would to like modify the existing gradle build configuration.
Fill in the Name, Select your project, and enter "build" as the task. Then config the environment variables as following:
# Remind that if you are using windows, the path should look like "C://..."PLUGIN_DEPLOY_PATH=<PATH_TO_YOUR_TEST_SERVER>/plugins/update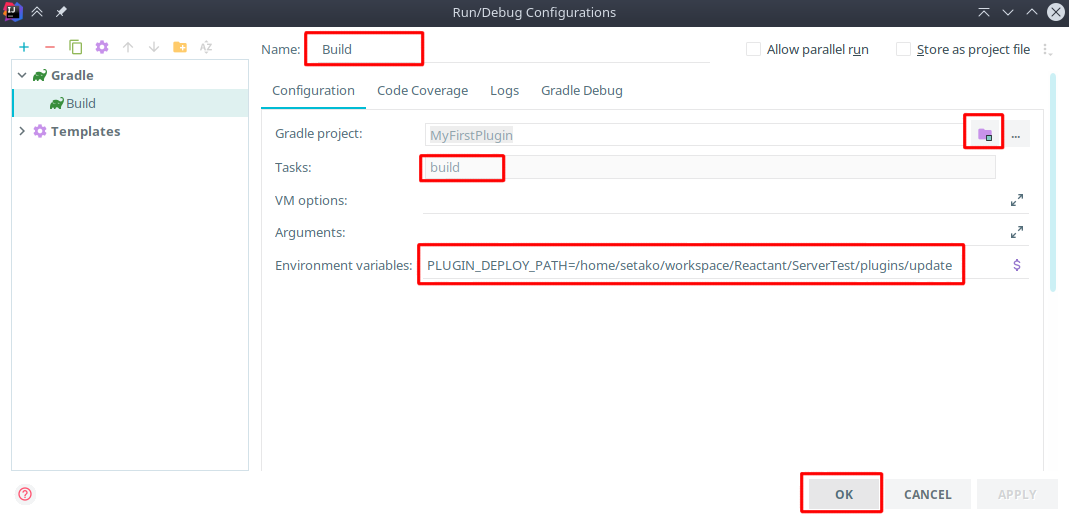
Now you can run the build task instead of using
gradle builddirectly, the build script will automatically copy the jar to your folder, and you can usereload confirmin your server to reload your plugins every time you compile.